Monday, December 2, 2013

My Inappropriate Elf

Well I caved, in the spirit of all that is fun for Christmas, and because well lets just be honest, now that I have a blog, I wanted to join the Inappropriate Elf Contest.  And, I want to use it to teach my son its more about giving than receiving..  We watched Elf on the Shelf the CBS Special on friday, and again this weekend.  Tim and I had our elf arrival tonight. His name is "Flashy Christmas"  More on that later.  This is supposed to be an Inappropriate Elf post.  So here it is.  At first, I thought about making him a brown trench coat, and have him flash his cristmas light... he he he but, then I thought, that is just not good enough.  Both winners (year one) and (year two) were both based on current buzz in the social media webs.  And? They were funny!
I was trying to think of major events of 2013. There was the whole Miley thing, but like twerking everyone is doing it.   Round the mom blogs I read? Babyshaming.  It all started from Dog Shaming.  And bummer for me, there is a whole Elf Shaming blog! But this one it's mine, so here it goes, Wish me luck.  I may post some more naughty ventures, as well as some fun ones we do for my son.  Eirly bird gets the worm gotta get this done to get it linked to the contest Babyrabies Inappropriate-elf-contest More Christmas posts to come! For now check out Jill on Baby Rabies, if you have never been there before, sit down, take some time and be ready to Laugh!
InappropriateElf2013
#InappropriateElf

Tuesday, August 13, 2013

Grilled Pizza with a little help from my Winco!


One of my favorite things about summer is the Barbecue.  I think anything made on it is 100% better.  For real.  I have this awesome Char-Griller 3001 Grillin' Pro. Yes, I know it's the propane one, and only the best grills are Charcoal.  But, I AM trying to grow when it comes to my BBQ skills so we have a side fire box attached to it for charcoal.  (I hardly ever use it.  Lets face it nothing beats charcoal but it takes TIME and planning to use it, and the fact that I need to learn to cook on it....)

One of the other favorite things I love and my boys as well, is pizza!  What we can't agree on is the toppings.  Believe it or not it's the first disagreement my husband and I had.  It was over pizza toppings, and just like Joey Tribbiani from friends says, "Joey Hubby doesn't share food!", and he wont compromise on toppings.  Our answer? 2 pizzas. Then we have lots of yummy left overs.  Well enter the picky child who "only likes cheese".  Pizza to make everyone happy can be expensive.  Well my friends, do you know about Winco Foods?  If you do not I have 3 words for you:  I am sorry.  And 3 more: Go. There. Now! 

Many of them have  Leonardi’s Pizza Co. inside them.  They will make pizza for you, I think there is a take & bake too. I have had their pizza at parties but never bought it myself because.... they also SELL THE DOUGH!  Hello?!?! How awesome is that?  Fresh pizza dough for $1.98!!??! That is cheaper than you can get the canned stuff and it is fresh and tastes better! You find it in the refrigerated section where you get lunch meats and pepperoni.  It can also can be found in the deli section. (How ever here is my secret, you can go to the bakery and ask for it frozen, that's where they have it, and you throw it in your freezer and have dough any time you want.   You can use it for bread sticks on spaghetti night, or cinnamon rolls... endless possibilities!  Also I am not required to bake it before the use by date because we all know stuff comes up during the week right?)  

With Winco's awesome prices we can afford to have healthy homemade pizza just how we like it.  All of my ingredients were found at Winco except for meatballs. (and you -can- find those there, we just like the Trader Joe's ones better.. sorry Winco)

Pizza Dough: $1.98 each
2 Lb bag Cheese: $4.99
8 oz Bag Cheddar Jack: $1.78
6 oz Bag Parmesan Cheese: $1.78 or 1.98
Pepperoni: $? I can't remember but less than 3 dollars maybe less than $2.00
Farmland Bacon: $?  Less than $4.00 some times it goes on sale for about $2.98 not often any more though
Tomato: $.98 a lb
Fresh Basil: $3.98 for the WHOLE BUNCH! (Its fresh and lasts a long time, some of that living stuff) 
Both the Ranch, and Red sauce were less than $2.00 each they sell it by the pound from the deli so it will vary in cost.
Now of course if you added all those up you might say it's still expensive but I can usually have three or four different meals with all this cheese, Pepperoni, basil, and Bacon.  And I know you could also make your dough cheaper, I simply do not have the time.  (Full time working mom here)  During the summer months I gather it all up, some times we take it in all in the back yard for a whole outdoor activity on the picnic table.  It depends on how hot it is.  :)

Here is my Grill:


I have found placing the pizza right on the grill cooks the bottom too fast.  I took the legs from my side firebox that I didn't use because its not a table top and saved them to make a riser. Then I put the pizza stone right on top of them.  It works GREAT!  I LOVE this grill.  It has 3 burners in it and a thermometer this really allows me to keep the heat just right.  When your grilling pizza it is so easy to under cook it, or burn it.  I also unscrew my top rack because there isn't enough clearance and it usually hits the pizza.


We are big fans of bread sticks at our house as well.  I always use one bag of dough for bread sticks. SO yummy!  I cook those on the grill as well and here is how I get them browned on the top.  I start off baking them on the top of the grill, then I move them to the inside through the side firebox. So the gas grates are above them.  I LOVE that I can do this! They get all golden brown and perfectly toasted that way.  ** Note you probably wouldn't want to do this if you were using your side fire box but I don't use it that much charcoal takes time. :)
While the bread sticks bites are baking, (this time I made bread bites it depends on my mood)  I get started on my pizzas.  We like to eat the breadsticks while waiting on the pizzas to bake.  I do not roll the dough,  I used to try to toss it (lots of practice!)

Just stretch it out on these pizza pans.  The holes help the dough stick to the pan and they keep it stretched out nicely and the dough goes on evenly.  I really like them.  ( Because we always make at least two pizzas I have two of them so I can make a 2nd pizza while the 1st one is baking)

My helper; dough presser, sauce spreader -  he may or my not have worn PJ's all day... 


We love the garlic ranch sauce we buy at Winco.  It makes THE. BEST. Chicken Garlic Pizza!


We also LOVE bacon at our house.  Have you ever baked it?  I have tried to do it on the grill but I end up burning it. Therefore I always bake my bacon.  It comes out so perfectly crispy and yummy this way.  To bake it just lay it on a cooling rack over a foil lined pan at 325 for about 30 min.  On nights I grill the pizza, I use my toaster oven to bake it so I don't heat the whole kitchen up.  The chicken pictured is from a left over chicken I cooked a couple nights before.  I love to cook a whole chicken and then shred it for several different things. :)  

The lower right photo above is a shot of cooking pizza on the grill. Here is what I have found works best:
1. The pan on top of a pizza stone.  The crust browns perfectly.  Pizza doesn't stick to it or the stone.  
2. If you have wood chips just toss them on grill. You get this amazing Smokey flavor. MMMM. I always forget to soak them so I often skip the wood.
3.Keep the heat around 400 - 425 it is going to change of course when you open the lid so I am constantly adjusting the heat.  You can't really walk away from it.
4.  Every 3 - 4 min turn the pan.  That way you don't have heat just in one spot.  I have found it has worked best if I start with all 3 burners on low, turn off the center for the second set of 4 min, then in the third set of 4 min I turn it back on.  Total cook time is between 12 - 15 min. 
5. The second pizza always cooks faster on the bottom.  I think this is because the stone is already super hot at this point.  I wish I could rotate them out but I only have one.

It has taken me about a year to find the perfect technique.  In the beginning I was using just the stone and it would stick and burn.

Here is Hubby's Pizza ready for the Grill:


Baking on the Grill:

Slice of goodness, the finished Product:

Have you made pizza at home? Do you have Any Grilling Secrets to share?  What are your favorite toping combos?


This is not a sponsored post.  Winco Foods did not ask me to write this.  I just share my Winco love because they awesome, and everyone should know and shop there if they have one in their town. :)

Tuesday, July 23, 2013

FIRE - How to make one fast with DYI Fire Starters & Camp Fire Doughnuts

So we love to camp.  Not Rough it camp, but throw stuff in the car, set up a tent, blow up the air mattress, light up the tiki torches, and plug in the Christmas lights camp.  It's fun, we get outside.  If we are lucky we stay dry.  Tim likes to call our camp sites tarpville some times as it rains so much where we camp in the North West.  One of the things we are not so good at while we camp?  Camp fires! They are essential to the camping experience you cant suck at this. That is us, we sucked.  All the lighter fluid in the world could not help us keep one.  Super frustrating! Last year, per my sister I saved dryer lint and toilet paper rolls, well the burned but FAST.  Too fast, again we would try the lighter fluid.     Along came pintrest and I kept thinking I need to figure out how to make some fire starters!  
You can check out some of my camping pins here:
http://pinterest.com/timandceri/camping/  

In the last few months due to some hand pain, I have had to pull out my paraffin bath.  The wax was old and gross, but it still did the job.  Once I ordered some new stuff I wanted to clean it out but did not want to waste the wax.   


I found some ideas for inspiration and went from there.  Most of them said to use sawdust.  I assure you, you do not need it.  


I didn't get some good pictures when I made them.  Forgive me the pictures above are staged.  That paraffin is brand new I don't want to make another batch right now.  Plus when I was doing it, taking photos for a blog post wasn't on my mind.  And, ya your hands are covered in wax and dryer lint.  

Things I learned.  You might want to cover your work surface with news paper.  The wax squirts out of the tubes and it can get a little messy.  Also, don't wear a nice shirt... again, it squirts....  It does dry pretty quick, as soon as the wax cools.  I used the kind of wax you use in a paraffin bath.  I am not sure if any other kind of wax would work or not.  If you try it with a different kind and have positive results let me know.  It takes a while for my wax to get gunky.  I don't want to waste it!  


Finished Product.  All bagged up!  I just stored them in a zip lock bag.  


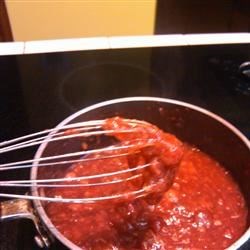
This stuff WORKS.  Like it BURNS, and it is amazing, You can hear a couple pops so it gets really hot!

Look what we made on our fire! 

I found the recipe for the camping doughnuts here: http://www.camping-tips.com/recipes.html
- refrigerated biscuits or frozen bread (thawed)
- 2 cups olive or vegetable oil
- 1/2 cup granular sugar (I mixed in cinnamon)
- 1/2 cup powdered sugar 

from there, I just winged it like I always do.  I did not poke the holes, maybe next time I will try that.  We also used some Jiff Hazelnut Spread. (Like Nutella!)


 My son believe it or not is not a big fan of smores, or melted marshmallows.  He just wants to eat them before they are toasted.  We had some left over Ghost Peeps from his Halloween themed birthday, (those things never expire!) and we decided to try these out.  He thought they we SO cool!  And yes, they are so so good toasted, but I love toasted marshmallows. Do you have any camp fire tips, or yummy camp fire treats to share? 


Monday, February 25, 2013

Baby Shower Cake - "A Star Is Born"

As I have established I like to bake.  I offered to help out for a fun baby shower that was happening.  The theme was "A Star Is Born".  It was on Oscar night.  I was told the colors were: Hot pink, white, silver and black

Here was the inspiration:  


Source: rosebakes.com via Ceri on Pinterest

It was fun!!  I took Friday off work so I wouldn't be up all night the night before.  Note to self: DO THIS ALWAYS!!   

The Plan:  I started baking thursday night so the cakes would cool and Friday I could make the fondant and cover it, what I didn't finish Friday  I would do Saturday.    


This is my go to fondant recipe: marshmallow-fondant-macsmoms-butter cream-flavored-variation. Super super easy, and it tastes good too.  

I really like Rosebakes.com!The host of the party shared the cake idea with me.   Rose linked to this cake blog post 
on cutting ribbon out of fondant:  

Source: rosebakes.com via Ceri on Pinterest


Until now, that has been a lost technique on me.  It was super helpful, and made it WAY less scary to try. (I had back up real ribbon in the plan just in case.)


I used 2 boxes yellow cake, 1 box strawberry cake mix.  Don't judge me.  I don't care that it comes in a box.  It's EASY, Hard Mess Up, and Tastes GREAT.... Maybe one day I will try it from scratch. Who am I kidding?? I never will.    I do however "mix" it up.  I follow the box directions but I add a box of instant pudding.  FYI: It makes the mix much thicker when mixing.  I think that it makes the cake dense and so so moist, and adds another level of flavor to it. 

  • Yellow mix got the following changes:  1 box vanilla pudding, and subbed milk for the cup of water. 
  • Strawberry mix:  1/2 bag frozen strawberries.  I pulverized them in their frozen state in my Cuisinart 9-Cup Food Processor. (I LOVE that thing!) until they were tiny bits.  (it was about 1 half cup.)  I figure that I should remove 1/2 cup liquid, so I subbed 1 cup water with the half cup strawberry mix, and then about 1/2 cup milk.  These are estimates, I am a mix an go kind of cook.  When adding the pudding it makes it so much thicker so you have room to play with.  
After the cakes were all baked and cool, I filled them.  Confession time: I cheat with butter cream frosting.  I go to Albertsons, and buy it from the bakery.  They sell it by the pound.  With the cost of butter, it is about the same, and I do not have to make it.  WIN!!!  

I filled it with layers of  Bavarian Cream (I cheated again and bought it at united grocers, cash & carry ran out of time because of the strawberry mix do over) and strawberry filling that I found via pintrest.
Source: allrecipes.com via Ceri on Pinterest


It tastes good and was super easy!  (we will leave out that I burnt the first batch Friday night, and had to make a new one Saturday)   (It was really easy, I just got distracted waiting for it to boil watching American Idol on the DVR)


If you have ever filled a cake before, you may or may not know a trick for keeping it oozing out.  It's called a dam.  You can use that by piping butter cream around the edge.


I wanted a layer of the filling to be strawberry cake A thin layer.  I baked one of the yellow cakes in a spring form cake pan.  The other cakes were done in an 8 inch round cake pan.  I trimmed some of the yellow from the spring form pan, to add a thin layer of yellow in the middle of it.  

This is what it looked like cut:
Anyway, I stacked them up, and dirty iced it.  I need to get better about making them all the same. exact. size, and doing a 2nd layer of icing after the dirty ice has dried.  (I always rush this part and regret it)  From what I read it will help with the lumps I have that annoy me so badly.  

So now, the 2 cakes are baked, iced, and covered in the white fondant I made Friday.  Things are going good!  But.... of course the top was too heavy so I used some of these  Hidden Pillars 4/Pkg-6  from Wilton. ..  First I just put one in.... still sinking.... then I trimmed one so that it opened up like a flower and set the top cake upon my make shift pedestal.

Next I proceeded to make black fondant.  Wow, it took forever, I like the CK Products colors they work really well, but to make black it takes a TON of it.  Luckily I added some raspberry LorAnn flavoring oil.    so it did not taste like food coloring. (I made that mistake before with Red) Using the ribbon cutting method from Rosebakes - how-to-add-ribbons-and-ribbon-borders-to-cake to make the ribbons.  
What I want: Wilton Decorate Smart Fondant Ribbon Cutter Set. What I used: OXO Good Grips Pizza Wheel it works right?? Now I was worried my fondant would stick together so I decided to use my Reynolds Freezer Paper.  This was great for my Kneading, but it STUCK TO THE PAPER SIDE.  So I rolled it back out and cut it again with the freezer paper folded in half so the plastic was on both sides.  (Normally I use parchment paper but i was out)  I was really surprised how easy it was to cut with a pizza cutter and ruler.  Also it helps if your fondant is a little thicker I think.    
RESULTS!


Next I worked on the Stars I cut up many.... borrowed some vodka from my neighbor to paint on silver and platinum dust.  Then I made these:
Don't look at the mess! All the freezer paper cuttings, I am a very messy cook....

Edible Glitter!! 1/4 sugar, 1/2 teaspoon of food coloring, baking sheet and 10 mins in oven @ 350


Source: planetpals.com via Ceri on Pinterest

I made the rope stanchions from paper straws, and Twizzlers Pull 'n' Peel.  I dipped them in sugar water, and then rolled them in colored "glitter" sugar I made from this pin:

Just mix a few drops of food color, paste, or gel to regular sugar.  Then bake at 350.  There is a note that the paste colors do smoke.  And they are right, it did but I caught it before it got bad and burnt.  Turned out perfectly! 


PROGRESS!


Then I rolled out the red hot pink carpet using the same technique above.  (Still worked well)  Not before discovering the HORRORS of making Gum paste!!  My stars from the day before were not drying out well.  Because I was making a wall I wanted to make sure it was going to hold and to dry out.  At first I thought I could half the container.  I planned on making a 50/50 mix of fondant and gum paste.  Maybe that was where I went wrong?  It was bad.  

So I had to mix about half a bag of powdered sugar..... way way more than the 1/3rd cup the instructions called for.  It's amazing I got it off! Hubby had to help, and used a spatula....  well this mess turned in to this
   

Simi FINISHED PRODUCT! (I added the shooting stars on the wire once I got to the party:


FRONT


BACK
I did not know it was going to be sitting on an island.  My messy ribbon ends and back of the wall were not perfect so I added a bunch of the extra fondant stars to cover it up.

Well there you have it.  My first baby shower cake!  The shower was pintrest perfect!  Super sweet hostess and co-hostess!  I want to go to more of their parties!  Super excited for the Parents to Be and their soon to be Baby KMG!  

Thanks for Reading... :)

x

Saturday, February 16, 2013

Neapolitan Cupcakes - What I do for the hubby


So last night, I forgot that I was going to bake something for Tim's team potluck at work.  Today is the last day of the old shifts, and although he is keeping his same shift (YEA!) he will have a new supervisor, and a new team of coworkers.  At his job, they do enjoy a good potluck. (they have them kind of often)  I am pretty much known for my Cake Cookies.  (I will get around to sharing them here one of these days) He told me about this a couple weeks ago while we were at Winco.  He said, "and I don't want cake cookies".  Now, I do love them because they are SO simple, and SO good.  Fine I said, what DO you want me to make.  I don't know why I ask him that, I mean really, I am just going to make what I want.  (Don't tell him that though!)  Perhaps, just to get an idea yea, that's it.  So I said, "How about strawberry whoopie pies, with Lemon Filling?"  He agreed and I picked up a box of mix.  

Enter 10:30 PM, last night.  He reminded me that the Potluck is tomorrow morning.  Why do I always wait till the last minute to do these things????? (maybe because I work full time, have a kid, and I am tired?? HA!)  I go to get started (forgot to turn off oven from dinner YES! that will speed things up!) and I find, I am out of Parchment Paper. Uggg! I pull out the  Silpat® Baking Mat and gross it need a good washing.  This is going to take too long. Well, we are no longer making Whoopie Pies...... How about cupcakes with Lemon filling? I ask him.  Do we have brownie mix? He asks back.  Why, yes we do! Along with strawberry cake mix, and yellow cake mix.  And a plan is forming....  Of course I am thinking WOW this is a MIND BLOWING IDEA! How about a Neapolitan cake? Made with Brownie, Strawberry and Yellow cake mix I ask.  He says humm look it up on Pintrest.  If it's any good you will find it there.  Well apparently I am not the only one with this idea bummer.  Can I call it my own?  Maybe.  I did think of it before looking on pintrest right?  I saw several ideas.  I clicked on this one: from SixSistersStuff.  I will say they confirmed my own inspiration.    I give you Neapolitan Cupcakes!! 


I mixed the brownie and Strawberry Cake Mix separately for that part, I followed the instructions on the box.  In the strawberry mix, I added a couple heaping spoon fulls of my home made strawberry jam and decreased the amount of water by 1/3 cup.  I used some liners from Ikea to line the pans.  They were a little tall because they were for one of ika's DRÖMMAR Muffin tin which is a bit taller than a normal pan.  I have not used them before, they were on a cheap sale. Honestly  I -really- like how they baked in them.  They make for a bit larger of a cupcake, nice and tall and don't over flow.  I will be getting some more of them!  I used my Oxo Good Grips® Medium Cookie Scoop and put one scoop of brownie mix on the bottom and 1 scoop of cake mix on the top.  I then baked them in the oven at 350F for about 25 min.  

While the cupcakes were baking I got to work on my frosting.  If you follow me on Pinterest I have a things to bake board, where I have found some pretty tasty recipes. For my sons birthday in October I made one of the "Marshmallow" Frosting recipes for his Ghost cupcakes.  I really like how well the frosting looked, and held up so I went back to the board to find the one I made before. I didn't use the same one which can be found here because it was too much.  This time I made one from Veronica Hurly's blog.  It can be found here   

It was so simple to whip up with my Kitchenaid Stand Mixer.  You combine 4 egg whites, 1 cup of sugar, heat that on the stove, and then whip it up with 1 tsp vanilla extract.  I then dumped it in a gallon zip lock bag with my  Jumbo icing tip, sniped off the end and iced away. 
24 cupcakes cooling and waiting to be iced!


all iced don't they look tasty!  

 I really like this icing, it allowed me to frost them while they were still a bit warm.  I topped them with some chocolate balls, and sprinkles  and a bit of red sugar crystals. 

I emailed the hubby to see how they went over, he said "One of the people that sits next to me mentioned the cookies. I told her you always make cookies so I asked if you could try something different. She said she likes the cookies :)"  .... ha ha could have gone with the cookies, but I got a 2nd email that said: Cupcakes are a hit. So far still have a bunch left but everyone enjoyed them and commented on how moist, professional looking, how you should make them all the time, yadda yadda....  well there you have it!
Enjoy!


Thursday, February 14, 2013

I Bake! Cakes, Cupcakes, and more! It can be for you, maybe?

I make cakes, cup cakes, and cake pops!


(this is a fun song from my childhood!)

OK, so those are not MY cakes, these are:


I have been making cakes because I am crazy for fun for a couple years now.  My husband Tim says I should start selling them.  That FREAKS me out! I do it for fun, and have made them for some friends and family.  It is a TON of work and although fun, not something I see myself doing for profit .    This month, I am making one for a baby shower on the 24th of February for a friend. On that same day, I am also going to donate one via a silent auction to a benefit for a woman have known since Kindergarten.  Her name is Chelsia Rice.  She has recently been diagnosed with a rare form of bladder cancer.  Her friends in Portland, OR are hosting:


 Love Bomb a benefit to help with her expenses.  There will be some pretty rocking music, and a silent auction.  I am donating a baked cake, cupcakes, or cake pops for your party or special event to bid on.  To keep up with her battle on Facebook check out:  https://www.facebook.com/ChelsiasCancerAdventure
You can read her story here: 
http://www.caringbridge.org/visit/chelsiarice (Warning, it will tick you off to read all of what this amazing woman has had to deal with.)  or here: http://www.greenerpastures.org/warriors/chelsia-rice/.  
You can get more info on this amazing event by checking out the event page on Facebook here: Love Bomb Facebook Event
   
If you have ever wanted a cake by me, or a super awesome cake made by creative person and help a person kick cancers ass, check it out!


Have a Batty Valentines Day!

My son is 5 and totally in love with bats.  It all started with batman of course.  He is in his 3rd year of Preschool.  Which means my 3rd year of making Valentines.  He is not a fan of having to write his name 25 times, so we start early.  The first year (he was 3) I was super smart, I bought them, (transformers) and printed his name on labels that he could trace then we had him stick his name on the card. Last year? I had discovered Pintrest!
Here is last years completed cards:

Chocolate Covered Marshmallows!


This year, as the name writing became a PAIN I wanted to do something that he would be excited about.  For his birthday this year my sister sent him the CUTEST bat card she made. So I thought, oh we can use this idea for bat Valentines.
I searched Pintrest, and there was "Valentine, you drive me batty" ideas, but hey he is five, I wanted to keep it sweet and simple. I felt that phrase was a bit above their heads for this age.
here they are in progress:

12 x 12 card stock, I fit 2 to a page then cut them out


25+ bats hanging on pixie sticks!


Well we got them done, the night before of course! Isn't that a requirement for valentines??
Thank's Aunt Tiffany for the idea.  And hope you have a Happy Valentines Day!

PS, I started a blog, because you know everyone else is doing it right???
Pin It button on image hover